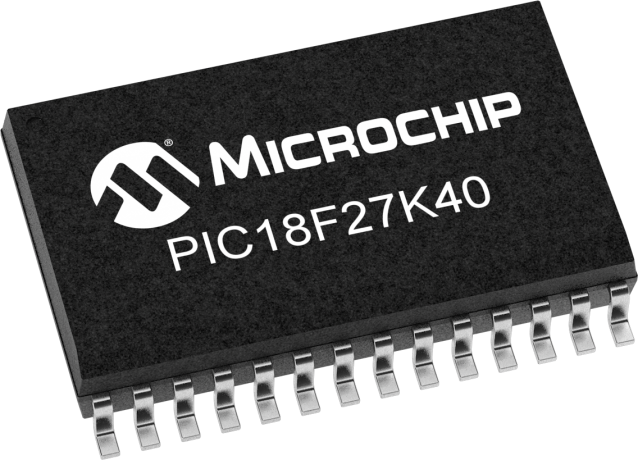
Microcontroller Selection
In order to narrow down the vast pool of 8 bit microcontrollers, we first identified our specific product’s requirements. We referred to the block diagram created earlier to get a pin count of the list of capabilites we would need to look for in an MCU. This included I2C peripherals, for our temperature and humidity sensors, an SPI peripheral for the fan motor driver motor driver, and a UART peripheral for communication with an ESP32 board.
Next, we used the Microchip Parametric Search Tool to search for 8 bit microcontrollers that met, at a minimum all of our project-specific requirements. We referenced the datasheet to collect specs on each microcontroller, then put them into a table for evaluation. A copy of the table is below.
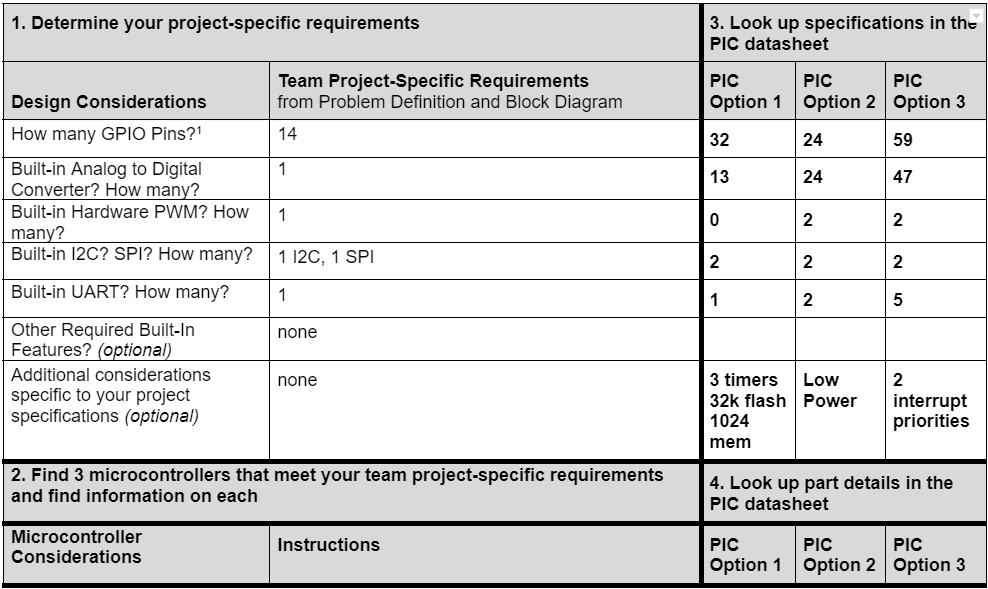
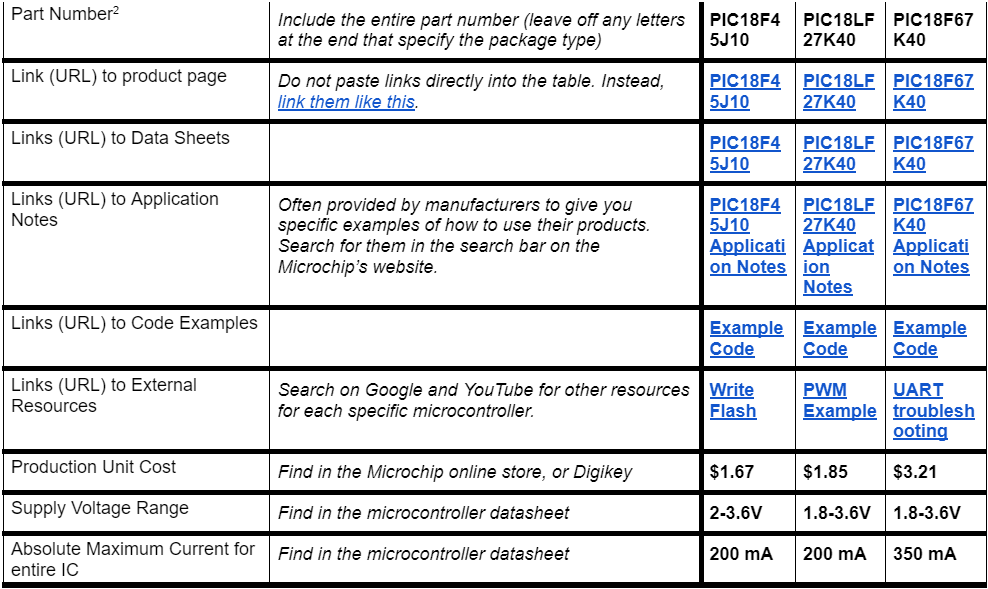
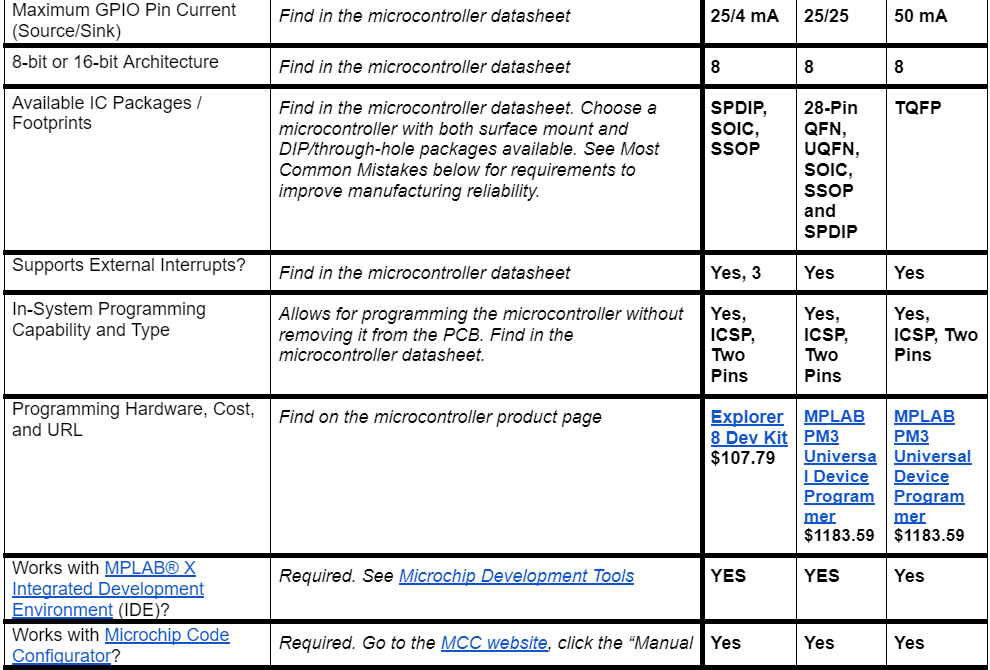
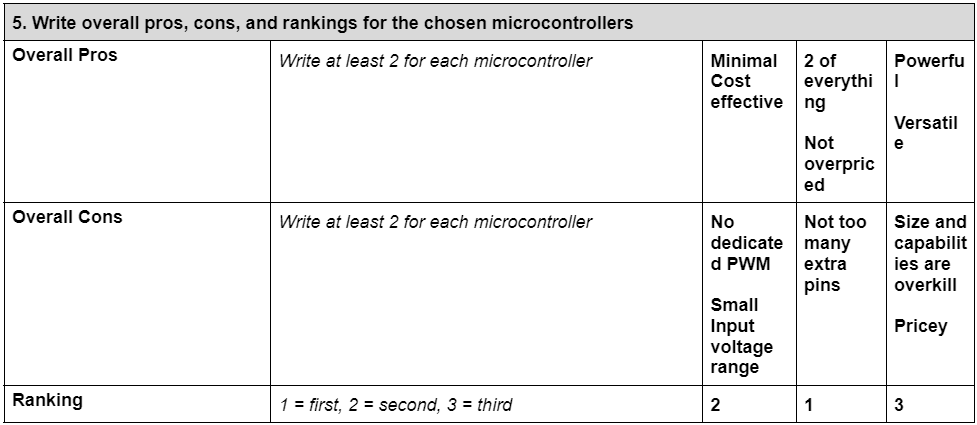
At first, we had little idea what to look for in a microcontroller, and even less understanding of how to find it. The naming convention for the myriad of different products was confusing and the language and format of the datasheets obtuse. However, by going through exercise of filling out the table multiple times for different MCUs, we felt we became much more comfortable and competent. Finally, we were able to make a final choice, based on the data we had collected, of the microcontroller that was optimal for our project. This decision was reached collaboratively by our team through the iterative process of researching, evaluating, and rating different microcontrollers as our understanding of the task at hand deepened.
The first MCU we researched was essentially randomly chosen - of the several dozen chips that could meet our project requirements, we just happened to select the PIC18F45J10. This was our first experience combing through microchip datasheets, and so we felt we wanted to get a little more experience. Since the PIC18F45J10 was rather small and minimal, the next chip we analyzed was at the other end of the spectrum. We chose the hugely powerful PIC18F67K40. This behemoth had the capability to everything our projcet required, five times over. We ultimately decided that it was too much. The final product, the PIC18LF27K40, hit the goldilocks zone for us. It had all of the required peripherals and just a few extra pins, in a reasonably sized package. However, one thing that really sold us on the PIC18LF27K40 was its ability to remap peripherals onto many pins. This would allow us lots of flexibility with our pin mapping and potential solutions to any mistakes made. We also verifiend it was compatible with MCC and MPLAB X IDE. We ended up choosing the PIC18LF27K40 as our final MCU choice.